Who owns an airliner,
do not performs random
flights, the company has a
schedule of dates
and times where each
plane carries
its flights in an organized and
pre-defined way.
The
Flight Control
was designed precisely in order
to organize and pre-set
flights to the commanders
who use Flight
Simulator as well as
the virtual airlines.
With a
simple and intuitive interface, the
Flight Control
allows the user to create, define
and change dates, flight times
and users. We will explain,
step by step, how to enjoy
all the features of the
Flight Control
from Spilfred.com.
1.
Access the
http://www.spilfred.com page.
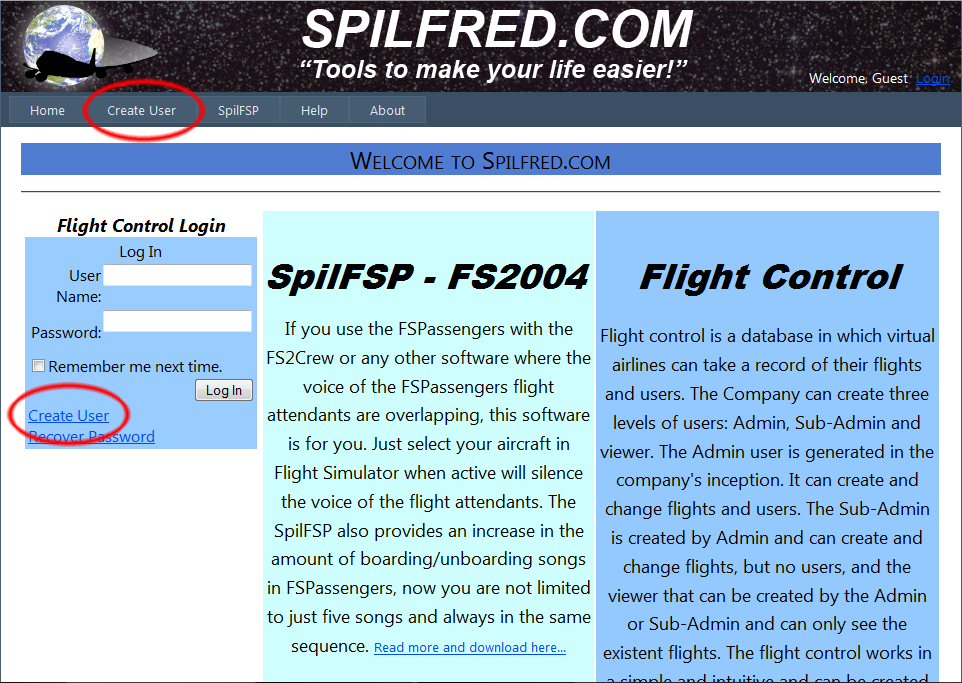
2.
In main page click on “Create User” menu.
3.
Type the user name in the field “User Name”.
4.
Type the a password in the “Password” field and
type it again in the “Confirm Password” field.
5.
Type the user e-mail address in the “E-mail”
field. The e-mail will be useful in
case of a forgotten password.
6.
Type the security question in the “Security
Question” field.
The question
whose answer should be something
that is easy to
remember. i.e:
Favorite movie.
7.
Enter the secret answer
in the "Security Answer".
In case of
forgotten password, the system
before sending the new password for the
user's e-mail will ask the
security question and
the user must enter
the answer. If
the response matches what
was entered when creating the
user, a
temporary password will be sent to
the registered e-mail.
8.
Click on “Create User”.

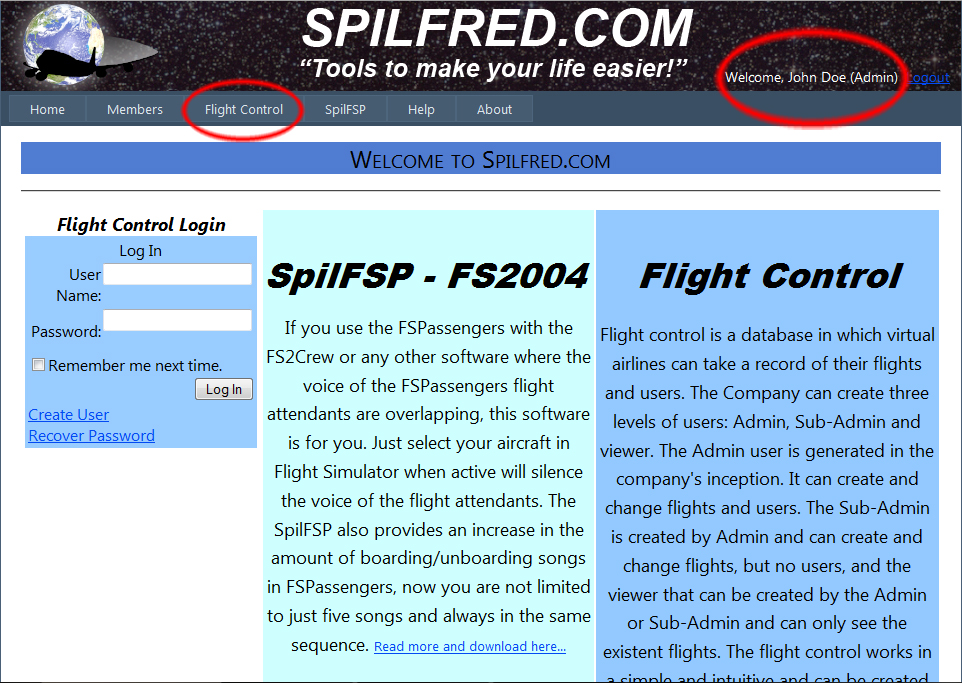
9.
Click "Continue"
and if the name of the
user you created appears
in the upper right of the page,
the user is already
connected to the
Flight Control
System.
10.
While the user is
connected to the system, the options
menu will show the "Flight Control" and
"Members" options. Click "Flight Control" to
access the main page of the system.
11.
On the main page
the user will have access
to the following:

From top to
bottom:
- The blue band with the
text "Default": It appears
where the name of your
virtual company (will
show how to change later).
- The “Flight” field: Shows the Flight number.
- The navigation
buttons: “<<”: Shows the first flight, “<”: Shows the previous
flight, “>”: Shows the next flight and “>>”: Shows the last flight.
- The “Departure Airport” field: Displays the
ICAO code
of the departure
airport.
- The “Departure City” field: Displays the city's
and the country of the departure
airport.
- The “Departure Time” fields: Displays the hours
and minutes of the scheduled
departure.
- The “Destination Airport” field: Displays the
ICAO code
of the destination
airport.
- The “Destination City” field: Displays the city's
and the country of the destination
airport.
- The “Duration” fields: Displays the hour and
minute of the
expected duration of the flight.
- The “Days” checkboxs: Display the
days
when the
flight
occurs.
- The “Aircraft”field: Displays data related
to the aircraft used for flight.
- The “Fuel” field: Displays data related to the amount
and use of fuel.
- The “Obs” field: Displays additional information and
comments about the flight.
- The “Create” button: When pressed creates
the flight on database
of the company.
- The “Change” button: When pressed
save
changes
made in the
flight.
- The “Delete” button: Delete the Flight from database.
- The “Clear” button: Clear all fields in page.
- The “Search” button: Search
flights that
meet the
selected
criterias.
- The "Status" text:
Displays information on the establishment and
number of flights.
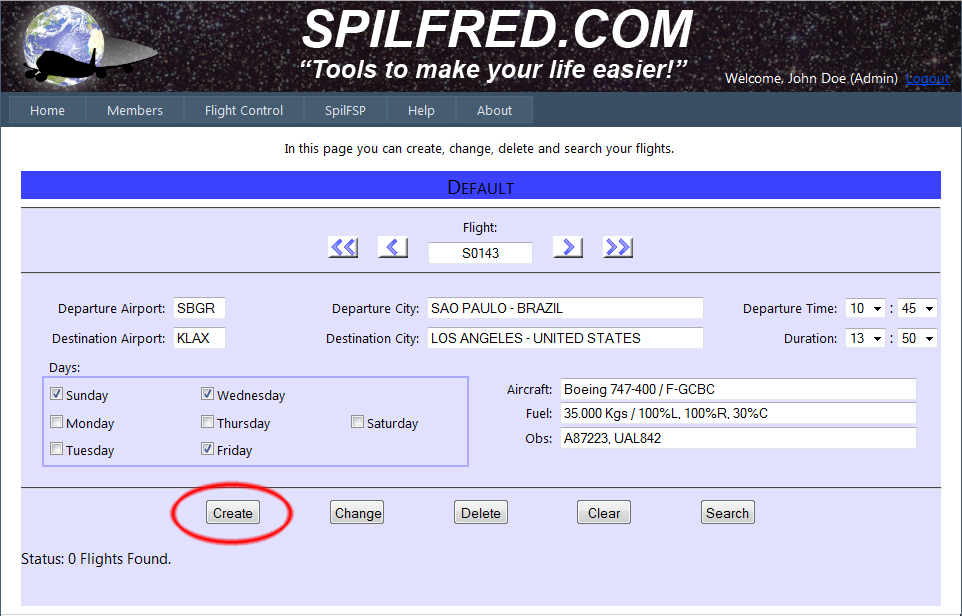
12.
To create
a flight,
first enter its code
in the "Flight" field (i.e. S0143).
13.
Type
in
the "Departure
Airport" field the
ICAO
airport
code
(i.e. SBGR).
14.
Note that
once you click off the field
"Departure Airport"
will automatically appear the name
of the city and the country
in the "Departure City" field.
15.
Enter the
hours and minutes for the departure
in the "Departure Time"
(i.e. 10 : 45).
16.
Similarly
fill the "Destination
Airport" (i.e.
Klax) and "Duration"
(i.e. 13 : 50).
17.
Click
on the days
that the
flight
will occur (i.e.
Sunday, Wednesday e Friday).
18.
Type
in the "Aircraft" field the data
relating to aircraft (i.e. Boeing
747-400...).
19.
Type
in the "Fuel" field the data relating
to fuel (i.e. 35.000 Kgs...).
20.
Type
in the "Obs" comments
you want about the flight
(i.e. A87223...).
21.
Now just click in the “Create” button.
Your
flight was
created.
22.
Do the
same to create as many
flights as
you want.
23.
If
you need to change any data of
a flight already created,
simply change the desired field and
click the "Change" button.
24.
The
"Delete" button when pressed,
erease the flight on display.
25.
To clear all
fields,
click the
"Clear" button.
26.
To search for
a flight, put
the data to the form and
click "Search".
(i.e. 1. To filter all flights departing from
SBGR: Click the "Clear" button
to clear the fields and then enter
SBGR in the "Departure
Airport" field, wait for the city
and the country appears
in the "Departure City" field
and click "Search" button. The text "Status"
will show how many flights departing
from SBGR are registered.
To see what
flights there click
on the navigation buttons: “<<”, “<”, “>”,
“>>”.)
(i.e. 2. To filter all flights that occurs
in "Sunday" and "Friday":
Click the "Clear" button to clear the
fields and then click the
days "Sunday"
and "Friday" checkbox
in the set of "Days" and click
"Search button. "In the text "Status" will show exactly
how many flights
occur on
selected days. To see what
flights was filtered
click the navigation buttons:
“<<”, “<”, “>”, “>>”.)
27.
To list all
the company's flights, place your
mouse over the menu "Flight Control"
and when the list appears
click on "Flights
List".
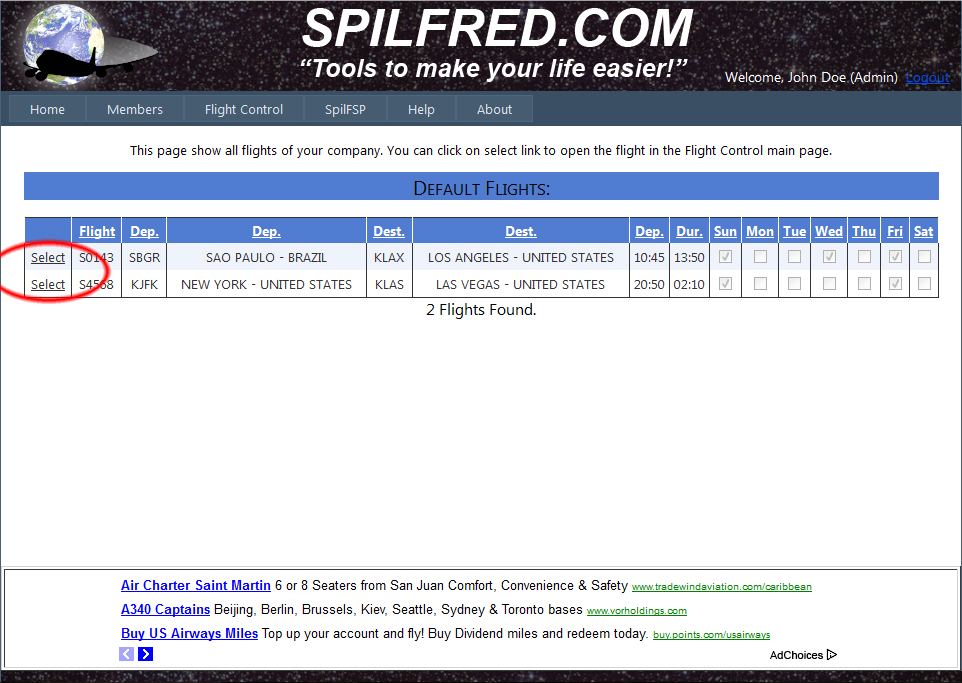
28.
Will be listed
in summary form, all the company's
flights. Click on the word
"Select" to display the flight
on the main page of
Flight Control.
29.
Are
registered in the
Flight Control
more than 24,400 airports.
If in the creation of
a flight,
the ICAO code entered does not
appear in the database, the user
may request the inclusion
of the code.
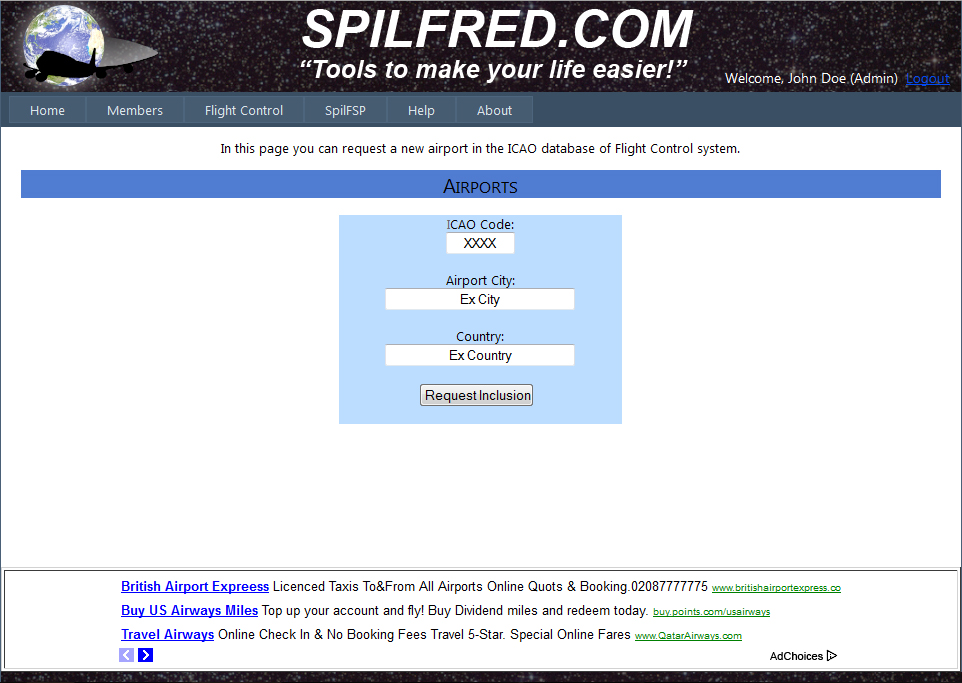
30.
To request
the inclusion of the ICAO code,
place your mouse over the menu "Flight Control"
and when the list appears
click on the "Airports".
31.
In the "ICAO
Code" field type the
ICAO code, in
the "Airport City" field
type the city from the airport and
in the "Country" field type the
country.
32.
By clicking the
"Request Inclusion" button
the code will be sent to the
site administrator for conference,
but will be already available in the
database.
33.
If
the administration of the
Flight Control
can not prove the existence of
the airport, both the
code and flights related
to it will be deleted
without notice to the user.
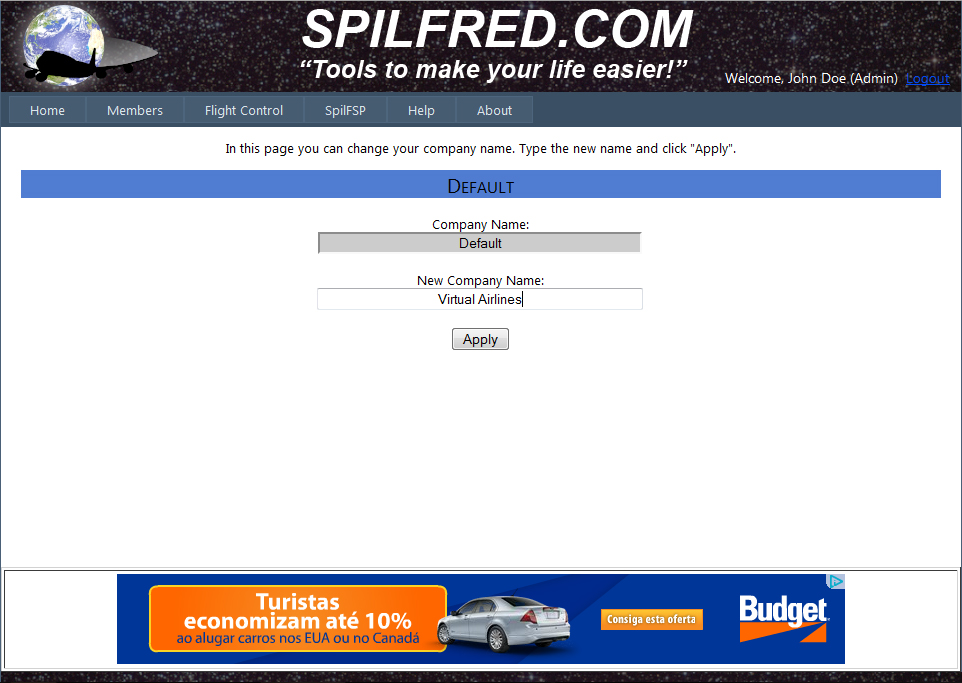
34.
To change
the company name put the mouse over
the menu "Flight Control"
and when the list appears
click the "Change Company
Name".
35.
The "Company Name"
displays the current name of the
company.
36.
Type
in the "New Company
Name" field the new
company name and click the "Apply"
button.
37.
The
Flight Control
has three user levels:
The "Admin" which is
who created and manages
the account, the "Sub-Admin" that can create, modify
and delete flights and the
"Viewer" that can only see
the flights registered.
38.
The
"Admin" user can create,
modify and delete users
through the page "Manage
Users", which is in the "Flight Control" menu.
39.
On the "Manage Users" there is
the following:
- On the left
is a box
for the
creation of
new user.
- On the right are listed
all users regarding the
account, except
the user "Admin".
- Below the box to create
new user there are two
radio buttons "Sub-Admin" and "Viewer".
- Below the user list
on the left are
two radio buttons:
"Sub-Administrator" and "Viewer",
and "Change" button.
- Below the list
of
users to the right there is
the "Delete" button.
40.
To create
a new user
please fill in the box to
create new users.
41.
Click the type of
user that
will be
created: (i.e. Sub-Admin) then click on “Create User” button.
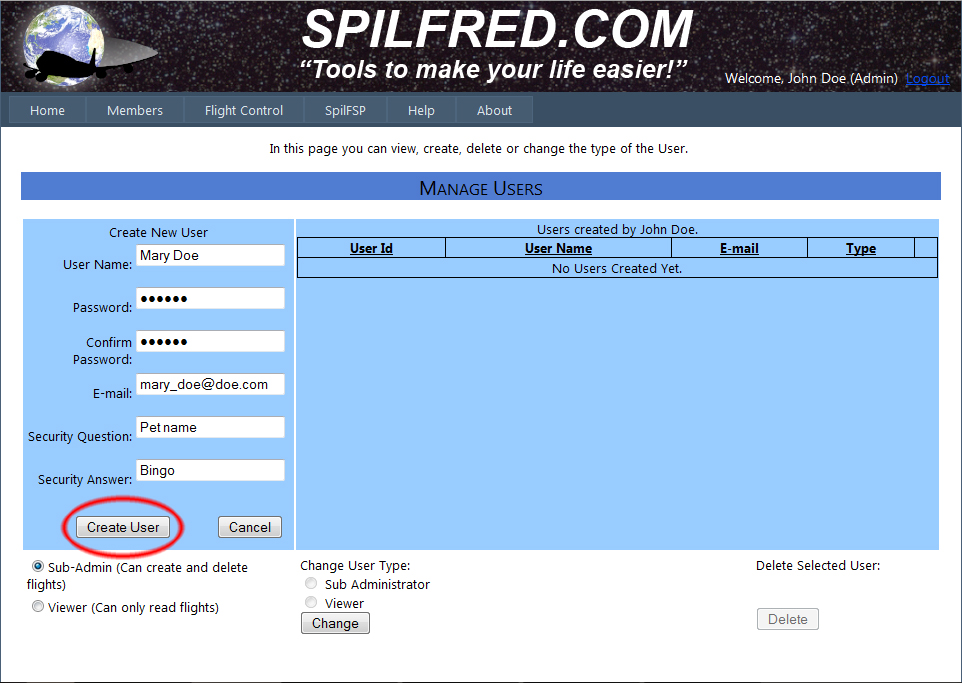
42.
Will appear
the confirm the creation of
new user. Click the "Continue".
43.
The
user just created now appears
in the list on the right side
of the page.
44.
To change
the type of user click
on the word "select" on
the right of each existing
user.
45.
Select
at the bottom of the type of
user who is assigned
to the selected user and click the
"Change" button.
46.
To delete
the user click on the word
"Select" and click the "Delete"
button.
47.
In the
Flight Control
users can change
their own
email
and
password.
48.
To change
your email or password
put the mouse over
the menu "Members" and
click the "Change Password /
Email".
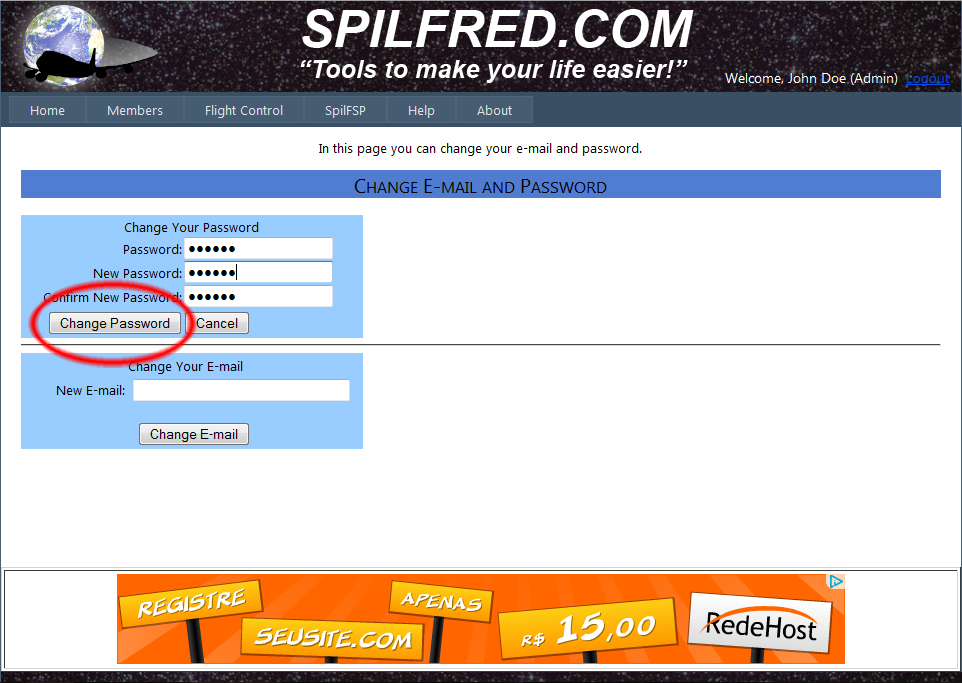
49.
Type
in the "Password" field
the current password, type the new
password into the "New Password" field, then in
"Confirm New Password" field
and click the "Change Password" button.
50.
After confirming
click the "Continue"
button.
51.
To change the
email, type the new
address in the "New
Mail" field and click the
"Change Email" button.
52.
A
text will be displayed stating
that the email was changed.
53.
To delete
an account with all flights and
users, put the
mouse over the menu
"Members" menu and when the list
appears click "Delete
Account".
54.
Type
the name of the Admin user
in the "Admin User
Name" field and click the "Delete" button (All users and
flights created
by this account will be deleted
as well).
For questions, comments and
suggestions please send email
to:
support@spilfred.com. I
will try to answer as soon as
possible.
I hope that this software
is useful to virtual
commanders as it was for
me.
Good fun and good flights.
Fred Matias